# Get Started
See Video Tutorial (opens new window)
# Create a New Layer
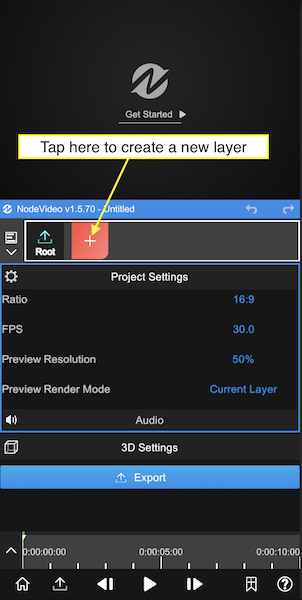
Click the red "+" icon to create a layer and import your media. You can also create layers such as shapes and fills.
# Add Property
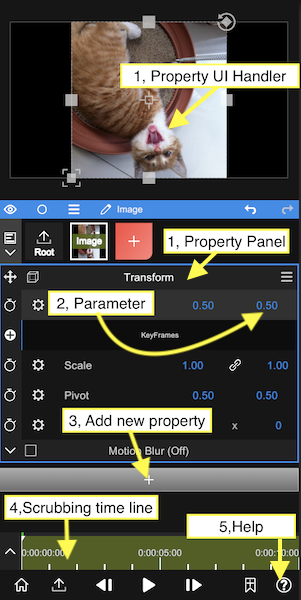
After importing the media, you can see the interface shown as the figure above.
- Every layer has the Transform property by default.
- Drag the property UI can change its position.
- Tap Transform to change property panel's opening state, and the UI will no longer be displayed after it is closed.
- Each property panel contains various parameters.
- Drag the Parameter to adjust the value.
- Tap the Parameter to edit its value by input.
- Tap the Parameter Label to open the key frame bar. while it is opening, changing the value will automatically add a new key frame.
- Tap the "+" icon to add new property (effects, masks, time remap, etc.).
- Scrubbing the timeline to preview.
- Tap help to learn more.
# Edit Timeline
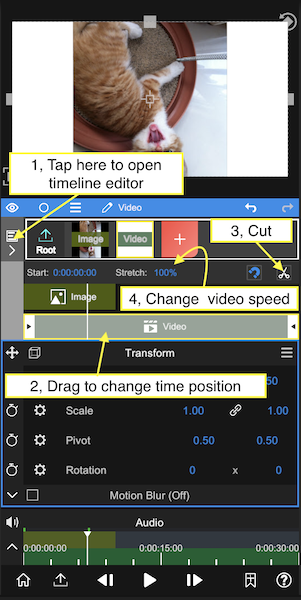
Continue to add a new video layer, and then click the root layer, at this time we can edit the timeline.
- Tap the icon on the left to open the timeline editor.
- Drag the item to change its time position.
- Tap the scissors icon to cut the video.
- Changing the stretch value can reduce or increase the video speed.
# Export

- Tap the "Export" icon in the lower left corner to open the export panel.
- Tap the "triangle" icon to start the export and wait for it to complete.
# Next Step
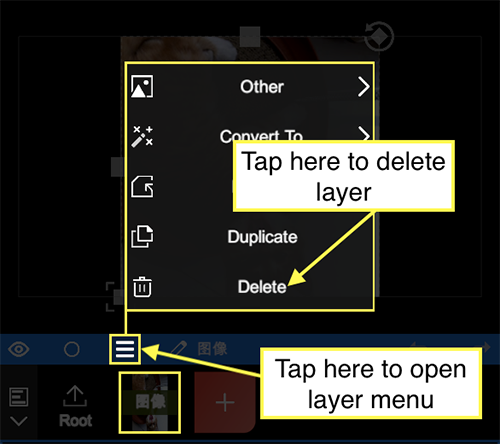
# How to delete layer
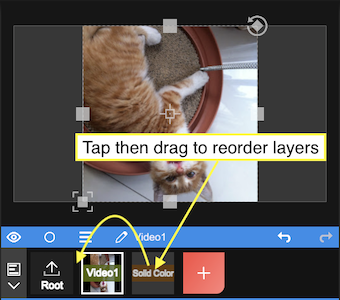
# How to reorder layer